Cara Mengarahkan Sub-Domain Ke Blogspot Via CPANEL Hosting

Admin Vectorpath kali ini akan membahas tentang bagaimana cara mengatur sub-domain ke blogspot, dimana kasusnya domain utama mengarah ke hosting dan sub-domain diarahkan ke blogspot, memang sepintas sepertinya agak ribet, tetapi sebenanya tidak terlalu sulit. untuk lebih jelasnya silahkan lihat gambar berikut.
1. Masuk ke bloger.com dan Masuk ke Setelan

2. Klik pada “Siapkan URL pihak ke-3 untuk blog anda”.

3. Masukan nama Sub Domain anda (misalnya “vectorpath.weverx.com” )

4. Kita Mendapatkan Cname dari blogspot untuk mengkonfigurasi domain kita, Simpan Cname nya ya.

Sampai Disini kita sudah berhasil Mendapatkan Cname Dari Blogspot. selanjutnya kita akan seting DNS, dari Home cPanel Klik Advanced DNS Zone Editor

Tambahkan satu persatu 4 ip blogsbot di Advanced Zone Editor
216.239.32.21
216.239.34.21
216.239.36.21
216.239.38.21

Jangan lupa tambahkan juga record Cname dari BLoger nya
admin pastikan kembali ya Record nya seperti gambar dibawah ini..
Selesai untuk mengatur DNS kembali ke Dasbord Blogspot. lakukan Simpan, Dan pastikan Sudah tersimpan sengan Sub domain kita. untuk proses perubahan biasanya memerlukan beberapa jam. Lihat gambar dibawah


Baiklah, apabila ada pertanyaan bisa disampaikan di kolom komentar, terima kasih

Apa itu CPANEL? What is cPanel?


cPanel, as its name suggests, is a web based control panel used for managing Linux or Windows based web servers or hosts. It allows users to control email addresses, domain names, databases, different PHP versions and almost every aspect of a web server, thus making it possible to manage all hosted services in a single place. Developed by the cPanel company, cPanel is mostly written in Perl.
cPanel is a great, customizable control panel, which successfully withstood the test of time, and has an active community behind it, which can help you overcome any problems or difficulties that arise during its use. The popularity and widespread use of cPanel is also due to the fact that it has a straightforward interface that can be easily comprehended by first-time users as well. But its enterprise-level features (multi-server management, IPV6 support) make it suitable for more professional use as well.

Accessing the cPanel

You can access the cPanel installation by means of a web browser. The address of the panel will be given by your server or hosting provider. You should not be scared by the :2082 in the URL as that is the port number to which cPanel listens by default. However, you should only access cPanel via a secure HTTPS connection, otherwise you might risk a security breach.


The cPanel interface

The cPanel interface has been refined over the years, again and again, and the interface itself can be customized by the web hosting company offering the services, but in general they have the following main sections: Preferences, Mail, Files, Database, Domains, Security and Logs. The easy-to-use and polished interface is one of the many aspects that account for the popularity of this control panel.

cPanel Features

cPanel is one of the most feature rich control panels out there.

In the Mail section you can set up new email accounts, forwarders, you can fine tune SpamAssasin settings, manage mail list, define catch all email addresses, etc. Most email settings can be done with just by a few clicks.
Under the Domain you can find the Simple Zone Editor through which the editing of Zones can be easily achieved. Here you can also define redirects and you can edit other domain and DNS related settings.
You can find the PHPMyAdmin usually under the use that too. Another nice feature Database section. The management of MySQL databases from a web interface is pretty convenient, but if you prefer MySQL Workbench you can of cPanel is the ability to “mount” or use remote databases. Besides MySQL, cPanel can manage PostgreSQL databases too.
cPanel comes with a very convenient backup system, which can be found usually under the File section. It can be used to create non-incremental, snapshot based backups from Databases, Files, Email settings, or you can back up the whole panel to a single archive. This feature is very useful when you want to move to another host, which also offers cPanel as a control panel. If you want to move from a hosting company to another one which uses a custom control panel, migrating can be quite a complex task, but not if it’s done from cPanel to cPanel. Here, under the Files section, you usually find the FTP settings page, which allows you to set up new FTP accounts, or edit old ones. You can specify the account’s home directory if you want, but it is usually pre-populated for you.

With cPanel, you can usually choose which version of a particular software you want to use, with just a few clicks you can select the PHP version for example. You still have the old PHP code which uses the mysq_connect and mysql_query functions? No problem, change the PHP version to 5.X and you are good to go. You want to squeeze some extra performance from your actual PHP web application? Just change the PHP version to 7.X and you can instantly benefit from the faster PHP interpreter in terms of page generation times.
Other features worth mentioning are raw and parsed access and error log access, so a developer can see the exact errors produced by the applications, while the site owner can see the access statistics and traffic fluctuations or trends. It has cron job support, you can define your custom apache handlers or even add custom mime-types, it has an easy to set up Basic Auth based folder password protection, easy to use SSL setup with self-signed certificates and/or CSR generation.

Hosting resources

You can always see the current resource usage like bandwidth, storage, number of FTP or Email accounts, number of databases, number of sent emails, etc. Some hosting providers even set up email based alerts if you are close to the set limit, so you can take immediate action. This can help you have a clear overview of your hosting resources and control their allocation.

cPanel Extensibility

The features of cPanel can be extended using third party plugins. There are quite a few ready-made plugins in the cPanel App Catalog, but it can also be extended by custom-written plugins.
cPanel has a well-documented JSON API with ready-made clients in PHP and PERL and also supports a command line API client called cpapi2. If you have some tasks which you find yourself doing over and over again, you might consider implementing a client which does that for you, either as a Plugin or as a API client.

Source with Some rewrite : webhostingmedia.net

How to Use the Pathfinder Tool - Illustrator Series

To display the Pathfinder you will have to go to Window > Pathfinder to make it visible.
The first Shape Mode is Unite, which will combine all the selected objects into a single larger shape. 
The second Shape Mode is Minus Front, and it allows you to use any top object to create a cutout from the one underneath.

The third option is Intersect, which will create a new shape by using the overlapping sections of the selected objects.
Last but not least, we have Exclude, which instead of removing any of the non-overlapping sections does the exact opposite and gets rid of the intersecting surfaces of the objects. 
Source With Some Editing :
design.tutplus.com

Apa itu DNS, Pengertian, Fungsi, dan Jenis dari DNS


DNS atau biasa disebut Domain Name Server adalah suatu sistem untuk menyimpan informasi host atau domain di dalam sebuah jaringan. Atau bisa pula dibilang jika DNS adalah suatu sistem jaringan yang mampu menerjemahkan domain (nama situs) menjadi alamat internet.

Nah yang dimaksud alamat internet disini adalah angka-angka alamat IP. Misalnya jika facebook.com memiliki alamat IP 69.63.181.11 maka jika kamu mengetik 69.63.181.11 di browser kamu maka dengan otomatis browser kamu akan menampilkan facebook.com pada alamat address nya.


Sejarah DNS

Dahulu, semua komputer yang terhubung melalui jaringan masih menggunakan HOST.TXT untuk memetakan seluruh domain. Namun sistem ini memiliki kekurangan diantaranya jika suatu saat alamat IP berubah, maka file tersebut harus ikut diubah. Nah, dari sana kemudian muncul suatu sistem baru yang bernama DNS, jika ada yang mengganti host di suatu tempat maka yang lain akan mengikuti perubahan tersebut secara dinamis.

Cara Kerja DNS

Untuk memahami cara kerja DNS, mari kita buat contoh sederhana seperti sistem yang ada di perhotelan. Misalnya kamu ingin mengunjungi beberapa teman yang ada di beberapa hotel. Lalu apa yang akan kamu lakukan? pastinya kamu akan menemui resepsionis dan memintanya menyebutkan nomor kamar dimana teman kamu menginap. Nah, untuk itu kamu perlu memberitahu nama teman kamu itu pada resepsionis. Dari sana resepsionis akan melihat di dalam database tamu dan memberitahu tentang nomor kamar teman kamu itu. Dia juga akan melakukan check apakah temanmu ada di kamar atau tidak.

Dari sini mari kita sedikit hubungkan dengan cara kerja DNS. Anggap saja kamu berperan sebagai client, resepsionis sebagai server DNS, nama teman kamu sebagai domain, dan nomor kamar teman kamu sebagai alamat IP.

Nah, dari sini Resepsionis akan mencari di dalam database dari semua tamu, yang disebut Domain Name Space. Jika temanmu masih di dalam kamar maka resepsionis akan mengatakan ada di nomor berapa teman kamu itu, begitu juga dengan sebaliknya. Sama seperti sistem DNS, jika kamu mengetik nama situs di browser kamu, browser akan otomatis mengirim permintaan ke server DNS, jika nama situs yan akan kamu buka terdaftar di dalam database, maka ia akan menjawab permintaanmu dengan mengirim alamat IP dari situs yang akan kamu buka, seperti 117.234.214.13

Memahami Nama Domain dan IP Address

Dalam hal ini kita akan ambil contoh domain www.google.com. Pertama, DNS akan memeriksa com yang merupakan singkatan dari domain commercial sekaligus sebagai top level domain.Setelah itu google adalah sub-domain dari com, dan www adalah sub-domain dari google. Sementara Dot( . ) digunakan untuk memisahkan domain dengan sub-domain.

Dari sini mungkin kamu sudah sedikit paham tentang DNS, nah sekarang jika seseorang ingin mengetahui hubungan  domain dari suatu alamat IP, maka ia akan meminta server DNS dengan alamat IP dari website. Sebut saja alamat IP yang dikirim adalah 31.13.79.246DNS pertama akan memeriksa 31 kemudian 13 kemudian 79 dan akhirnya 246. Hal ini berarti 31 memiliki poin utama atau bisa disebut domain utama sementara alamat 13, 79, 246 adalah sebagai sub-domain. Jumlah 246 mengacu pada mesin server hosting website www.fb.com

Jenis jenis DNS dan Fungsinya

A record: digunakan untuk memetakan hostname ke IP address 32-bit (IPv4).

AAAA record: untuk memetakan hostname ke IP address 128-bit (IPv6).


MX Record: digunakan untuk memetakan domain ke mail exchange server

CNAME Record: kalo yang ini membuat nama alias dari sebuah domain.

NS Record: digunakan untuk memetakan domain kedalam satu daftar dari DNS Server.

Resolving DNS

Hal ini mengacu pada proses penerjemahan nama domain ke alamat IP masing-masing. DNSresolver adalah PC Client, sama seperti kamu di hotel itu misalnya, yang akan mengirimkan query ke server DNS atau resepsionis. Ada dua metode yang sering digunakan dalam hal ini, yaitu :

Recursive: Sekarang mari kita lanjutin dengan contoh Hotel diatas tadi ya, anggap hotel ini memiliki lebih dari satu cabang di kota, dan resepsionis tidak dapat menemukan nomor kamar teman kamu. 

Lalu ia akan memeriksa apakah teman kamu telah tinggal di cabang lain dengan menghubungi resepsionis hadir di sana. Jadi, jika server DNS tidak dapat menemukan IP dari nama domain yang dikirim dalam permintaan maka ia akan meminta server lain yang terhubung untuk menyelesaikan alamat IP untuk domain yang diminta. Artinya ia akan mengumpulkan informasi dari server lain lalu membalas dengan alamat IP yang kamu minta.

Iterative: Misalkan jika kamu juga ingin tahu tentang di lantai mana letak kamar teman kamu itu, maka untuk melakukannya, kamu tentunya akan bertanya lagi pada resepsionis. Sama seperti, jika DNS resolver ingin informasi lebih lanjut tentang domain, maka ia akan mengirim permintaan baru untuk server DNS yang sama.

DNS Cache

Server DNS sementara waktu ini akan menyimpan query permintaan kamu dalam bentuk Cache, sehingga dapat mengurangi waktu respon jika ada penyelesaian DNS lain yang meminta permintaan yang sama. Waktu yang berisi informasi Cache yang valid disebut TTL (Time To Live), diatur oleh administrator untuk setiap record query disimpan dalam cache.

DNS Vulnerabilities

Cache Poisoning: atau bisa juga disebut DNS Spoofing, adalah teknik yang digunakan oleh cracker, di mana mereka akan mengubah data cache di server DNS lalu merender alamat IP yang salah kepada DNS resolver, kemudian bisa jadi untuk mengalihkan pengguna ke perangkat attacker.

Phishing: adalah suatu metode untuk menipu para pengguna untuk mencuri id / password melalui form login pada suatu situs palsu yang menyerupai situs aslinya.


Custom DNS

DNS sejak pertama kali di buat adalah suatu terobosan yang sangat penting bagi kelangsungan setiap website. Bahkan kini ia mampu menghandle jutaan situs website di seluruh dunia. Tanpa DNS, pasti setiap orang akan kesulitan bahkan hanya untuk berselancar di dunia maya. Sekarang aku tanya, apa kamu masih ingat berapa IP Address dari facebook.com tanpa melihat halaman diatas? pasti susah kan? aku pun juga tidak ingat sebenarnya karena sudah ada DNS yang akan membantu kita mengingatnya.

server DNS populer:

Google’s Public DNS: Raksasa internet yang satu ini juga memiliki layanan DNS gratis yang mampu menanggapi jutaan permintaan dalam satu waktu. Untuk mengkonfigurasinya, kamu bisa melakukan setting DNS :

8.8.8.8 atau 8.8.4.4

OpenDNS:adalah sebuah perusahaan swasta yang menyediakan server DNS gratis yang aman dan terpercaya. Untuk mengkonfigurasinya, kamu bisa melakukan setting DNS :

208.67.222.222 atau 208.67.220.220


sumber artikel

[OOT] How to fix 'This app has been blocked for your protection' error on WINDOWS 10

Windows 10: How to fix 'This app has been blocked for your protection' errorBidness ETC
Windows 10 brings a host of security enhancements to prevent unauthorised intrusion into the operating system (OS) and user files. However, this mechanism could sometimes block or flag legitimate programs and apps from functioning properly.
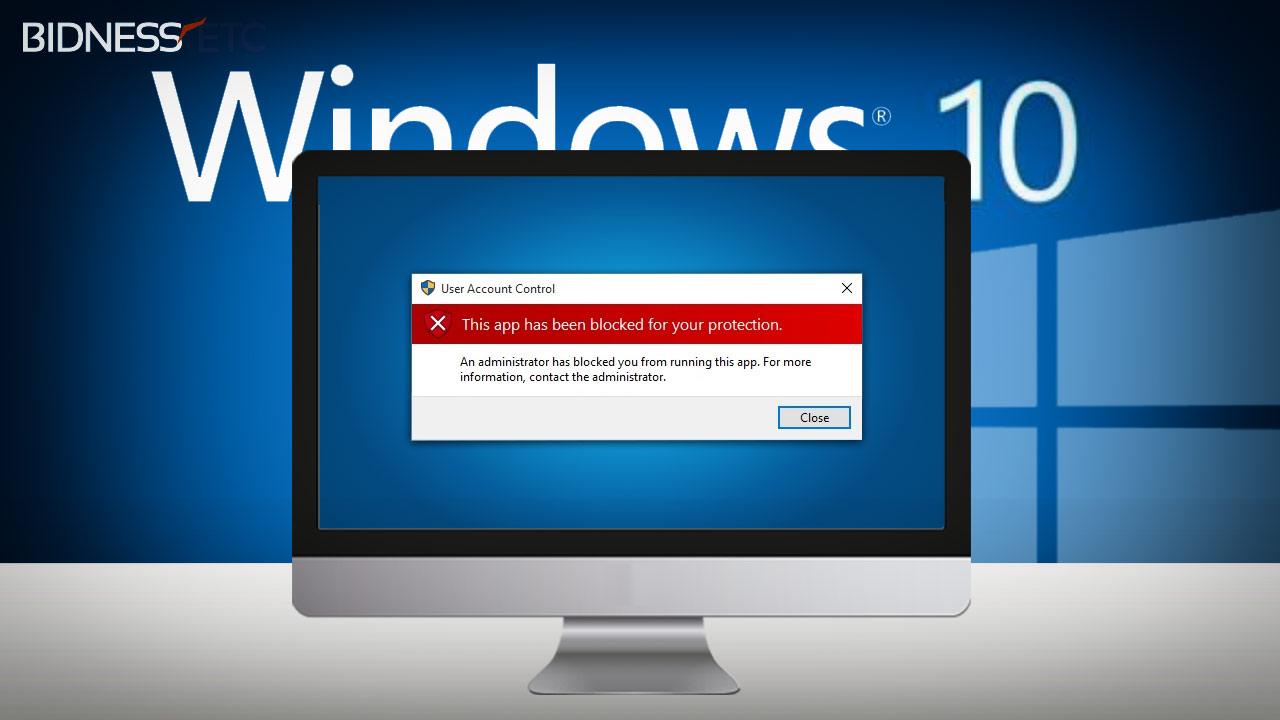
Affected Windows 10 users may encounter interference with the execution of normal Windows programs in the form of persistent error messages such as: "This app has been blocked for your protection".
In other words, the issue can interfere with the execution of setup files of a program that you wish to install, wherein you cannot run the setup.exe file even after using elevated Administrator permissions with User Account Control (UAC).
At this moment, you will see an error message with the following subtext:
"An administrator has blocked you from running this app. For more information, contact the administrator."
Here are a few simple steps to bypass or circumvent the "protection error" in Windows 10, after enabling the hidden Administrator account:
Step 1: Launch Start Menu, search and select Command Prompt. Then right-click on it and choose Run as Administrator from the context menu.
Step 2: Type the following command without quotes at the Command Prompt and then hit Enter:
net user administrator /active:yes
You should see the message saying "command completed successfully".
Step 3: Launch Start Menu once again and right-click on user-account title at the top-left of the screen. Then click Sign-out.
Step 4: At the login screen, log into the Administrator account and you will return to the Desktop of that user profile.
Step 5: Locate and run the .exe file for the program which you want to install.
Step 6: As you have already logged into the Administrator account, the Smartscreen protection will be disabled and the installation should complete successfully.
Step 7: After you have completed the installation, just log back into your regular account after logging out of the Admin account.
Step 8: Finally, disable the Administrator account that was used earlier to prevent malicious access to your system files from external sources like hackers and cyber-criminals.
Just execute the following command (without quotes) to accomplish this feat from Command Prompt: "net user administrator /active:no".
[Source: Bidness ETC]

How to Create Banner, Label and Badge Templates in Illustrator


Final product image
What You'll Be Creating

In this tutorial you will learn how to create different banner, label and badge templates which you can use in your future art projects.

The A to Z of Typography


Final product image
What You'll Be Creating

Whichever software programme you’re using, and whether you’re designing for print or online, typography will no doubt play a large part in the eventual success (or failure!) of your design. 
A timely drop cap or an extra bit of tracking can elevate your designs to new levels, in the same way that a poor choice of font or illegible sizing can ruin an otherwise perfectly good layout.